Remote Control Your Ham Radio Station Through Raspberry Pi
This post is about how to remote control your amateur ham radio station through a Raspberry Pi with Simple Ham radio remote web app.
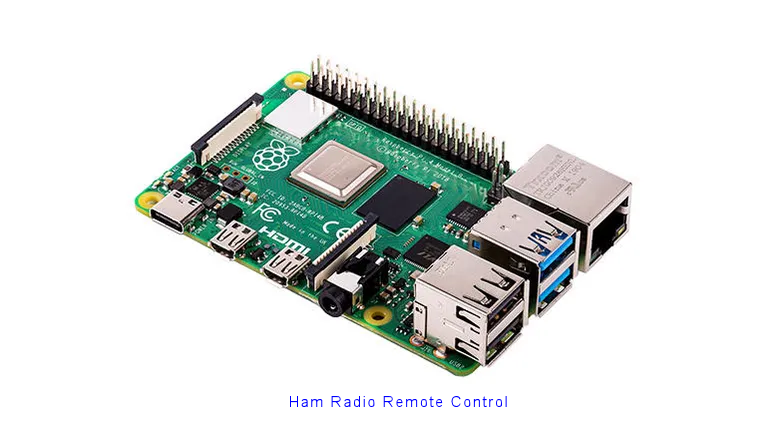
*Raspberry Pi (RPi)

A versatile single-board computers made by the Raspberry Pi Foundation.
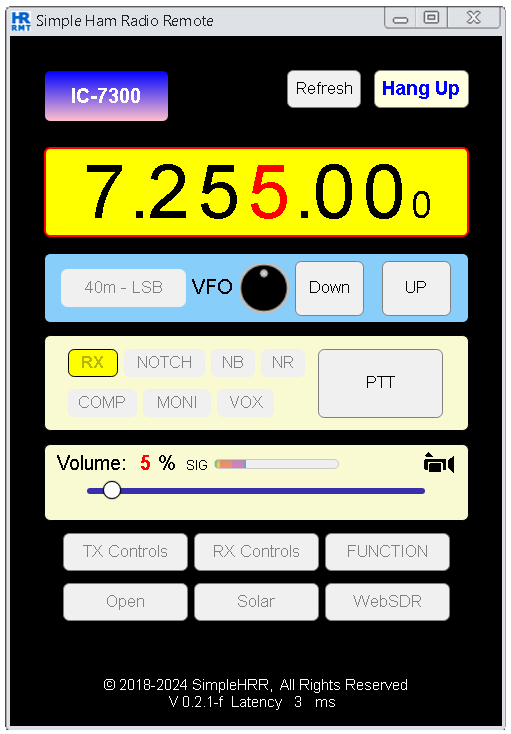
*Simple Ham Radio Remote (SimpleHRR)

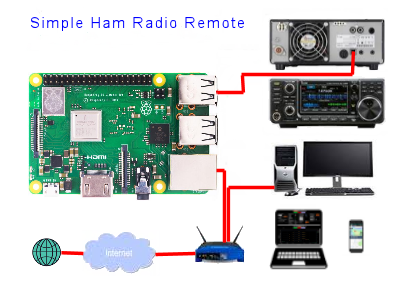
The image above illustrates how easy it is to remote control an amateur ham radio HF transceiver with Simple Ham Radio Remote and a Raspberry Pi.
Simple Ham Radio Remote is a free web app, it comes preinstalled on a Raspbian Lite Image which is flashed onto an 8GB or larger microSD card using your favorite software to flash microSD cards. There is No additional software to install.

System requirements
- Ham Radio Callsign
- Chrome or Firefox web browser
- Admin access to your router
- Active Internet connection
Hardware required
- Icom IC-7300, IC-7610
- micro SD card adapter
- micro SD card (8GB class 10 or larger)
- Raspberry Pi (3B - 3B+ or 4B armv7l)
- Raspberry Pi Power Supply 2.5A - (3A - 3.5A better)
- Cat5 Ethernet cable
- USB Type A Male to B Male Cable
- USB - Bluetooth - 2.4GHz Wireless mouse with a scroll wheel (optional)
- Computer with an SD slot (or an appropriate SD card adapter)
Download, Install the Image onto your microSD card
- This image contains everything you need to get up and running quickly.
-
Download: SimpleHRR v0.2.1-T
Simple ham Radio Remote simplehrr-icom-yaesu Current release...
Windows: Install the Image onto your microSD card
-
Download: SimpleHRR v0.2.1-T
- Extract the image double-click the .zip file then click Extract All.
- Insert the microSD card into the computer's SD card slot use the SD card adapter if needed.
- Next, flash the image to the microSD card with your favorite image writer. There are various image writer you can use, example Etcher - Raspberry Pi Imager works for Linux, macOS or Windows.
- Now remove the flashed microSD from the computer, keep it in a save place will insert it into the Raspberry Pi later.
Prepare the Radio for Remote Operation
IC 7300 Click to select radio
IC-7300 Firmware version should be at least 1.2 or higher.
-
Menu -> Set -> Connectors ->
- ACC/USB Output Select: AF
- ACC/USB Output Level: 50%
- USB MOD Level: 50%
- DATA OFF MOD: USB
- USB Serial Function: CI-V
- USB Send/Keying -> USB SEND: OFF
- USB Send/Keying -> USB Keying (CW): OFF
- USB Send/Keying -> USB Keying (RTTY): OFF
- CI-V -> CI-V Baud Rate: Auto
- CI-V -> CI-V Address: 94h
- CI-V -> CI-V Transceive: ON
- CI-V -> CI-V Output (for ANT): OFF
- CI-V -> CI-V USB Port: Unlink from [REMOTE]
- CI-V -> CI-V USB Baud Rate: Auto
- CI-V -> CI-V USB Echo Back: ON
-
Menu -> SET -> Function ->
- Time-Out Timer (CI-V): 3min
IC 7610 Click to select radio
IC-7610 Firmware version should be at least 1.3 or higher.
-
Menu -> Set -> Connectors ->
- ACC AF/IF Output -> Output Select: AF
- ACC AF/IF Output -> AF Output Level: 50%
- ACC AF/IF Output -> AF SQL: OFF (OPEN)
- USB AF/IF Output -> Output Select: AF
- USB AF/IF Output -> AF Output Level: 50%
- USB AF/IF Output -> AF SQL: OFF (OPEN)
- MOD Input -> USB MOD Level: 50%
- MOD Input -> DATA OFF MOD: USB
- CI-V -> CI-V Baud Rate: Auto
- CI-V -> CI-V Address: 98h
- CI-V -> CI-V Transceive: ON
- CI-V -> CI-V Output (for ANT): OFF
- CI-V -> CI-V USB Port: Unlink from [REMOTE]
- CI-V -> CI-V USB Baud Rate: Auto
- CI-V -> CI-V USB Echo Back: ON
- USB SEND KEYING -> USB SEND: OFF
- USB SEND KEYING -> USB Keying(CW): OFF
- USB SEND KEYING -> USB Keying(RTTY): OFF
- USB SEND KEYING -> Inhibit Timer at USB Connection: ON
-
Menu -> SET -> Function ->
- Time-Out Timer (CI-V): ON - 3min
Connect the Raspberry Pi to the Radio
- Plug the USB cable into the Raspberry Pi the other end into the Radio.
Connect the Raspberry Pi to Network
- Plug the Cat5 cable into the Raspberry Pi Ethernet port the other end to the LAN.
Booting the Raspberry Pi for the First Time
- Insert the flashed microSD card into the Raspberry Pi microSD slot.
- Power ON the Radio (e.g IC-7300, 7610).
- Power ON the Raspberry Pi.
- Wait for the Pi to boot up - the green LED should stop flashing when it's finished!.
Get the Raspberry Pi IP Address
- Open a browser and Log in to your router as admin. The router IP address is usually something like 192.168.0.1, 192.168.1.1 or 192.168.1.254 or 10.0.0.1
- Find Attached Devices -> Device Name (Raspberry Pi simplehrr) - IP Address
(something like 192.168.x.x or 10.x.x.x). - Write down or copy the corresponds IP Address you will need that to set up Simple Ham Radio Remote.
Set up Simple Ham Radio Remote on your Raspberry Pi
- Turn the radio ON
- Open a Chrome or Firefox web browser enter the URL:
https://your-Pi's-IP-address:50000/remote - Enter Username: Ham Radio Callsign (confirmed on QRZ.com)
- Enter Email address: Optional: Just leave noemail@noemail.com
- Enter Password: (greater then 8 char)
- Select Radio: (IC-7300 or 7610)
- Select Dev USB: (/dev/ttyUSB0)
- Click [ Activate ]
- Verify the information is correct Click [ OK ]
- Wait 1 minute for Raspberry Pi to reboot.
- Click [ OK ]
- Enter Username (your Callsign)
- Enter Password (your Password)
- Click [ Sign in ]
- Click [ Call Radio ] when it turns green.
Be patient it takes a little longer to turn green on a first time install.
Logout:
- Click [ Hang Up ]
That's it.
Read me:
- The first boot takes about 2+ minutes because all SimpleHRR prerequisites are installed during the first boot. Wait 2 minutes, then start checking https://your-Pi's-IP-address:50000/remote
- If you don't have the selected radio connected to the USB-Serial port, when you click [ Call Radio ], you will get an error message "Unable to Connect to Radio!".
- This installation is for LAN access only. See user manual for Internet access.
- Access the user manual using your username and password the day after setting up SimpleHRR.
- Simple Ham Radio Remote supports most Icom CI-V, Yaesu CAT controlled HF transceivers.
- Always review the FCC rules - regulation before operating any two-way radio remotely
Simple ham radio remote web app is fully functional, but still in the process of refining some aspects of the web app.
